Chamber Door Replacement
Vacuum Chamber Door Operator Replacement Instructions
PLEASE CALL 858‐779‐9148 ‐ OPT. 3 FOR ASSISTANCE
In order to reduce downtime, the chamber door can now be installed by the operator.
Please read through the entire document before replacing the door.
Be careful not to over tighten any fasteners!
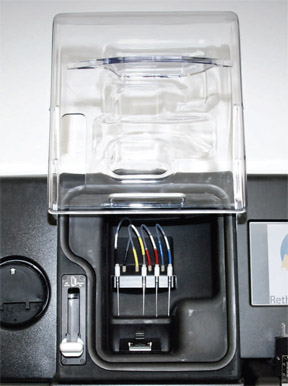
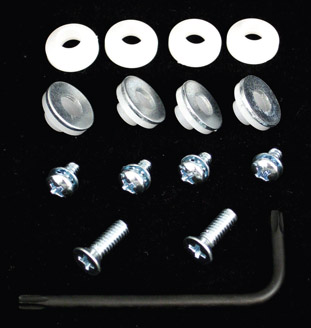
Provided Kit: (pictured in order)
• Chamber Door (shown above)
• 4 Plastic Bushings
• 4 Bonded Washer Bushings
• 4 Phillips Screws
• 2 Pan Head screws
• T‐15 Torx Wrench
Also needed: Phillips head screwdriver
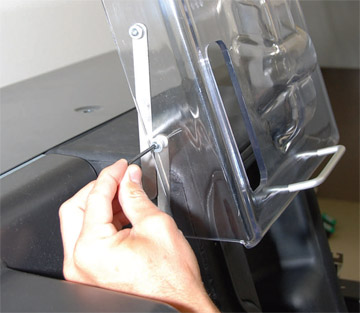
Remove Old Chamber Door
A) Before removing the old vacuum chamber
door, raise the door to the open position (both
lower and upper hinge arms are vertical).
B) Use one hand to hold door in this position,
and use the other hand to loosen and remove
the screw and bushings from the lower left
hinge arm using the appropriate driver (T‐15
Torx, or Phillips). Repeat for the lower right
hinge arm.
C) Use your finger to push the lower hinge
arms inward and drop both hinge arms down
to the side of the chamber.
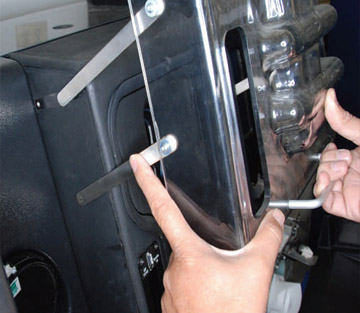
D) Rotate the door up and forward, to lay the
door on top of the machine.
E) Remove the screws and bushings from the
upper hinge arms.
Caution: the upper hinge arms are spring
loaded. For safety, make sure the door is on
top of the machine as shown before releasing
the upper hinge arms.
F) Use your finger to push the upper hinge
arms inward and remove the old door.
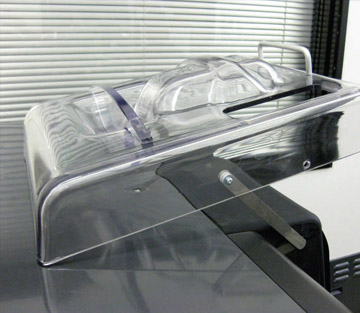
Swap Handle to New Door
A) Using the appropriate driver
(Phillips or Torx) remove the two
screws from behind the vacuum door
handle on the old door.
B) Re‐attach handle to the new vacuum
chamber door using the two pan
head screws provided.
NOTE: Be careful not to over tighten
the screws.
Swap Handle to New Door
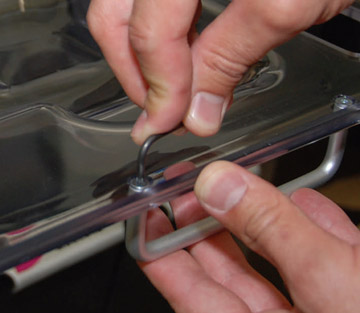
Attach New Door - Upper Hinge Arms
A) Attach new plastic bushings to the
inside of both upper hinge arms and
slide each hinge arm securely in to
place inside the new chamber door.
(The old bushings may still be on the
shaft and can be discarded).
B) Attach a bonded washer bushing
with one of the four supplied screws,
and secure it with a Phillips head screwdriver
to the outside of each upper
hinge arm. (Do not over tighten the
screws or they will snap off! )
There will be some side‐to‐side play
once the screws are tightened.
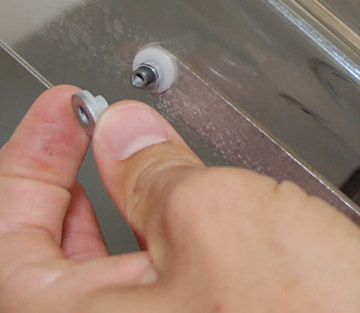
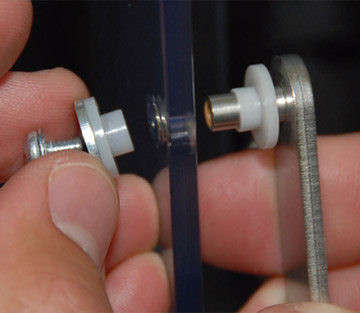
Attach New Door - Lower Hinge Arms
A) Install new plastic bushings on
the inside of each of the lower
hinge arms (discard the old bushings).
Position the chamber door
as shown to allow the lower hinge
arms to be slid into place.

B) As before, Attach a bonded
washer bushing with one of the
four supplied screws, and secure it
with a Phillips head screwdriver to
the outside of each upper hinge
arm. (Remember — do not over
tighten the screws or they will
snap off! )

C) Discard the old door in the
trash. You may keep the torx
driver if desired.
DOWNLOAD: Chamber Door Replacement PDF- Do not attempt to download this PDF if you are viewing from the InkCenter)