Syringe, Distribution Valve and Infusion Removal/Replacement
IMPORTANT: Please read through the document completely before starting any repairs. Refer to the proper section in the service manual for complete removal and replacement procedures.
SYRINGE REPLACEMENT
Syringe and O-Ring
- Install O Ring over the threaded part of the syringe
- Slide O-Ring down
- There is a lip where the O-Ring will seat
- Install Syringe as normal and perform Syringe Calibration
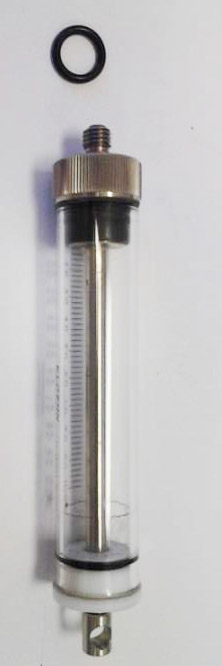
When replacing a syringe please remove the syringe and valve as a unit from the infusion pump as shown below. Once the valve and syringe have been removed, unscrew the old syringe from the valve body and make sure to remove any old black O-rings out of the valve port
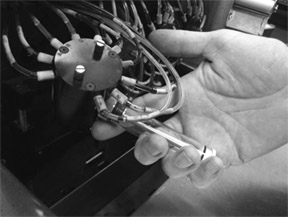
With the valve upside down, place a new (white) O-ring in the syringe port of the valve (unless there already is a white washer in place)
Working with the valve off of the pump makes it easier to remove and replace the syringe, and will help prevent cross-threading of the syringe
Install the new syringe and hand tighten, but do not over tighten. Do not use any tools to tighten the syringe!
As when tightening or replacing any syringe, please make sure you run Syringe Calibration when you are done installing the syringe(s)
- Run Syringe Calibration procedure:
- Navigate to Tech Pane Tab
- Select the “Tests” button in the lower right
- Select “Syringe Calibration”, then follow the on screen instructions
- Once the process is complete select “Process” in upper right of tests page to return to tech pane
Keep the extra black O-rings for future machine repairs (leaking connectors)
Distribution Valve O-rings
- Install O-Ring on the cap at the back of the valve
- Slide it down until flush
- It has a recessed area that will accommodate the O-Ring nicely.
- Install the Distribution valve as normal and run syringe calibration
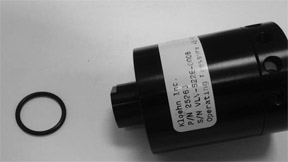 0 Ring and Distribution Valve
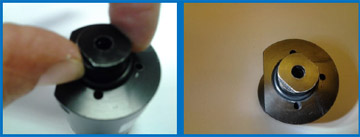
DISTRIBUTION VALVE REPLACEMENT CHECK LIST
- Verify the Valve is in home position prior to replacement (see last page)
- Note any ink leaks from the back of valve and if it has contaminated the infusion pump circuit boards
- Remove one line on the valve at a time and place onto the new valve
- The front of the valves has letters on them as do the tubing lines. Use them to verify their proper placement. DO NOT mix up the tubing lines
- Only replace damaged fittings on the ink lines with supplied brown fittings if necessary (tubing is damaged; missing parts)
- Only put 1 new O-ring in ports “A” and “C” (of each color valve – Cyan, Magenta and Yellow). The Black valve gets an additional O-ring in port “L”
- Make sure the O-ring is fully seated and centered in the valve port prior to inserting the connector
- The additional O-rings can be used if a flanged connector leaks or can be kept by the technician for future use
- Make sure the syringe is finger tight to the valve. Use the top metal part of the syringe to tighten. Do not tighten by the glass cylinder or it may break
After replacing a Distribution Valve, Syringe or Infusion Pump:
- Ensure all fittings on the distribution valves are finger tight (4 valves, 10 fittings each)
- Run Syringe Calibration procedure
- Navigate to Tech Pane Tab
- Select the “Tests” button in the lower right
- Select “Syringe Calibration”, then follow the on screen instructions
- Once the process is complete select “Process” in upper right of tests page to return to tech pane
- Run Syringe Leak Test procedure and note any issues
- Navigate to Tech Pane Tab
- Select the “Tests” button in the lower right
- Select “Syringe Leak Test”, then follow the on screen instructions
- Once the process is complete select “Process” in upper right of tests page to return to tech pane
- If the Distribution Valve has been replaced, Prime the ink lines
- From Ink Center Tab, select one of the ink droplets
- Select the color that needs to be primed, then select “Start Prime”
- Select “Priming Complete” when procedure is finished.
- Touch any gray part of the screen to return to Ink Center tab
- Verify all ink lines are full
- If all ink lines do not prime or stay full, call support to prime the lines individually
Tubing Connectors
When removing a tubing connector, caution must be taken to prevent damage to the end of the connector.

After unscrewing the connector, gently rotate the whole tubing assembly counterclockwise as you pull the tubing out to prevent damage to the flanged end, and the washers and O-Ring (shown below).
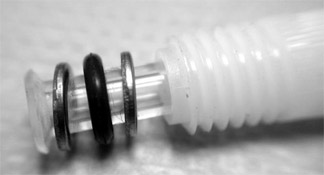
Tubing Connector Replacement
If a connector is damaged or missing parts, it must be replaced
Please read through the procedure before you begin! Make sure you have the right parts before you begin:
Ferrules (small, white, plastic, funnel-shaped), fittings (light-brown, threaded), and a
black plastic cutter.
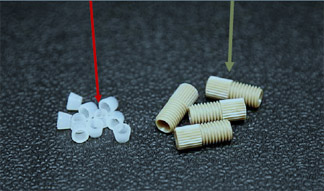
Remove the work surface to access the infusion pump area.
NOTE: If the fitting is broken, and parts remain in the valve, use a small scribe, needle nose
pliers, etc…, to remove the parts.
- Push fitting back along tube to expose a clean part that has no kinks or damage.
- Cut tube carefully, and as straight as possible; then remove old fitting and dispose of
all old parts.
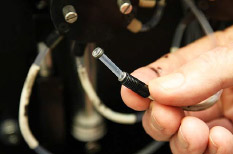
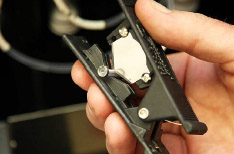
- Place new fitting onto tubing, thread side down (toward end of tubing).
- Place ferrule onto end of tube, with the wide end positioned towards the end of the
tube. Make sure that the ferrule is flush with the end of the tube.
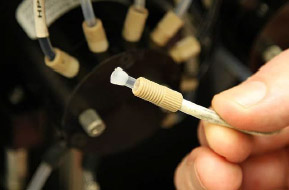
- Check to make sure there is an O-ring in place if required for that port.
- Slide tubing back into valve and tighten fitting finger tight; be careful not to cross
thread!
Infusion Pump Replacement
The following actions must be taken to prevent possible damage to the system or components. Please read through the document completely before starting any repairs.
Refer to the proper sections in the service manual for complete removal/replacement procedures
10 black O-rings are included with a valve. Only place O-Rings in ports “A” and “C”. The Black ink valve also gets an O-Ring in the “L” port. Make sure they are fully seated and centered in the port.
- The rotary valves attached to the current pump must be in the “home” position before removing them. This is done by initializing the infusion pump, which occurs during every startup. Reboot the InkCenter from the Maintenance Tab to reinitialize the infusion pump. Alternately you can perform a Machine Shutdown and cycle power instead of rebooting
- If the system is hanging up during startup due to an error and valve initialization does not occur, then the pump must be initialized manually. Please call RIS service at 858-779-9148
- Once initialized, remove the valves from the infusion pump to verify that they are in the home position prior to removing the current infusion pump. The home position on the valve and drive post is in the horizontal position as shown
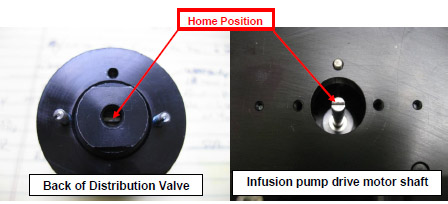
Once you verify the valves are in the home position, you can remove the current infusion pump and replace it with the new one. Verify the drive shafts for the valves in the new pump are in the home position before mounting the valves onto the pump body
To Remove the Infusion Pump
- Remove 2 screws from each remaining distribution valve
- Remove 1 screw securing the syringe to drive bar
- Gently pull the distribution valve and syringe off the infusion pump
- Rotate the valves up and close the chamber door to help hold them out of the way
- Reposition the tubing going through the top of the infusion pump
- Remove the 25 pin connector at the back of the infusion pump
- Remove 4 nuts securing the infusion pump to the machine
- Gently Pull infusion pump forward to remove
- Make sure none of the tubing in kinked or stuck in the top of the infusion pump
- Reassemble in reverse order
NOTE the nuts that secure the unit should not be over tightened. The blue vibration dampeners are useless if the nuts are over tightened. When the nuts are properly secured, there should be 1-2 threads of the bolts exposed. There is no need to tighten the nuts completely.

Call 858-779-9148 option 3 for assistance
DOWNLOAD: Infusion Pump Syringe Connector Valve PDF (do not try to download the PDF document when viewing from the InkCenter touchscreen)